
Blog
CAD for Interior Design: Getting Started with AutoCAD

CAD for Interior Design: Getting Started with AutoCAD Without Overpaying
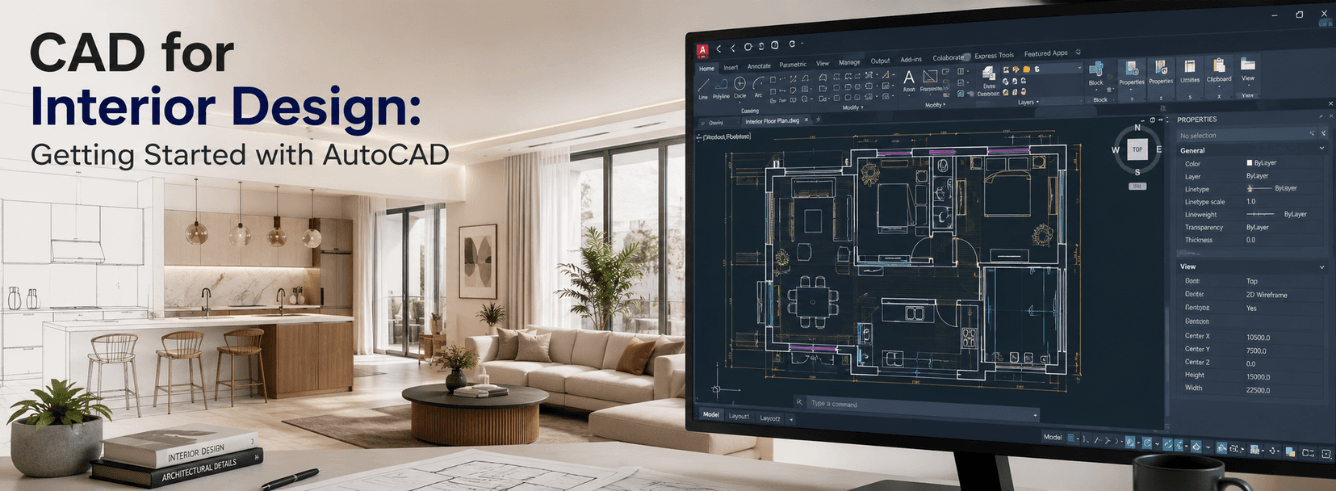
If you’re moving from hand sketching or mood boards into CAD for interior design, the question isn’t whether AutoCAD can handle the work — it’s whether you’re getting the right licence at a price that makes sense for the way you actually practise.
- Full AutoCAD (not LT) includes the interior design toolset with 8,000+ furniture blocks, lighting symbols, and finishes templates — and you can get it for $59 instead of $99/year through Zoftis.
- You don’t need a commercial-grade $1,499 licence unless you’re running a multi-seat firm billing large-scale commercial projects.
- Floor plans, elevations, reflected ceiling plans, and finish schedules all live in one .dwg file — no switching between apps.
- Most competitors teach you how to use CAD; this guide also covers how to acquire it, what to skip, and where the real time-savings live.
What CAD actually changes for an interior designer
Hand-drawn floor plans and marker-rendered elevations have soul. But they also have a hard ceiling: one revision means redrawing, one mis-measured room dimension cascades through every sheet, and sharing with a contractor or lighting consultant means scanning, emailing, and hoping they can read your notes.
CAD for interior design doesn’t replace your design eye — it removes the repetitive friction that eats your billable hours. Three things shift immediately when you move into AutoCAD:
Precision stops being optional effort
When you draw a wall in AutoCAD, it’s exactly 3,450 mm because you typed 3,450. When you offset it for the finished wall thickness, that offset is identical every time. Room dimensions derive from the geometry — you’re not measuring a sketch and hoping. If the client changes the kitchen depth from 3.2 m to 3.8 m, you stretch a polyline and every connected element follows.
One file holds the whole project
Floor plans, furniture layouts, lighting plans, elevations, finish schedules, and millwork details all sit in layers inside a single .dwg file. You freeze the furniture layer, and you’re looking at a clean RCP for the electrician. Thaw it, and the client sees the full space plan. No separate drawing sets to keep in sync.
Set up layer states early — one for demolition, one for proposed floor plan, one for electrical, one for furniture layout. Switching between them takes one click instead of redrawing.
Output scales to whoever’s reading
A single model-space drawing can produce an A1 construction sheet at 1:50, an A3 client presentation at 1:100, and a PDF for the joiner at full size — all from the same geometry. Scaled drawings stop being a separate task.
The interior design toolset most people never open
AutoCAD ships with seven specialised toolsets, and the Architecture toolset — which includes the interior design workspace — is the one that matters here. Yet a surprising number of designers buy the software and spend their first year drawing furniture blocks from scratch. Here’s what sits waiting inside the toolset:
- Furniture blocks library: Over 8,000 pre-drawn blocks covering seating, tables, beds, storage, appliances, and sanitaryware. Drag in, rotate, and dimension — no block-creation session needed.
- Lighting symbols and RCP tools: Downlights, pendants, wall sconces, and track heads with standard electrical notation, ready to drop into a reflected ceiling plan.
- Finish schedules generator: Tag a room, assign floor, wall, and ceiling finishes, and the schedule populates automatically. Change the finish in the tag, the schedule updates.
- Millwork detail components: Baseboard profiles, crown moulding sections, door and window trim — parametric so one profile works at any scale.
- Annotation and keynoting: Standard interior annotation symbols — section cuts, elevation markers, detail callouts — all tied to a coordinated numbering system.
The toolset is included with full AutoCAD — it’s not a separate purchase. If you’ve already got AutoCAD, open the Toolsets palette from the ribbon and select “Architecture.” The interior design workspace activates automatically.
Which AutoCAD features matter for interiors — and which don’t
AutoCAD is a deep product. A civil engineer uses about 40% of it; an interior designer uses a different 40%. Here’s a straight breakdown of what earns its place in a designer’s workflow versus what you can safely ignore:
| Feature | Relevance to interior design | Should you learn it? |
|---|---|---|
| Layers & layer states | Essential — separates floor plan, furniture layout, lighting plan, and elevations | Yes, day one |
| Blocks & dynamic blocks | High — reusable furniture, fixtures, and annotation symbols | Yes, week one |
| Xrefs (external references) | Useful — attach a survey or architect’s base plan without modifying it | Yes, within first month |
| Paper space & viewports | Essential — produce multiple scaled drawing sheets from one model | Yes, week two |
| Dimensions & annotation scaling | Essential — room dimensions, wall lengths, and notes that stay legible at any scale | Yes, week one |
| Hatching & gradients | High — wall fills, floor material indication, section cuts | Yes, within first month |
| 3D modelling | Optional — useful for millwork details; most interior designers pair AutoCAD 2D with SketchUp or 3ds Max for 3D | Nice to have, not urgent |
| Parametric constraints | Low — designed for mechanical engineers, not space planning | Skip |
| Point clouds & ReCap integration | Niche — only if you’re doing as-built surveys of existing spaces | Skip unless needed |
| Express Tools | Moderate — some useful batch commands (break line, arc-aligned text) | Explore after month two |
The interior design toolset does 80% of the heavy lifting — the other 20% is knowing which 15 commands you’ll actually use every day.
The licence conversation nobody spells out
When you search for AutoCAD for interior design, most guides talk about commands and workflows. They skip the part where you have to pay for the software. Here’s the reality in August 2026:
The direct-from-Autodesk price
AutoCAD costs roughly $250/month or $1,975/year if you subscribe directly from Autodesk. That’s $1,975 leaving your practice every year — indefinitely. For a sole practitioner or small studio doing residential interiors, that’s a noticeable line item before you’ve billed a single hour.
What a Zoftis licence actually is
Zoftis sells genuine Autodesk subscriptions at $59/year — activated on your own Autodesk account, downloaded from Autodesk’s servers, with the full 2024–2026 release. It’s the identical product, the identical activation portal, the identical interior design toolset. The difference is that you’re buying through the secondary market rather than from Autodesk directly, which is how the price drops from $99 to $59 for the standard subscription, or from $1,975 to a fraction of that.
You do not need the $1,499 Commercial Licence unless you’re buying for a multi-seat firm that requires named-user commercial billing. Independent interior designers and small studios are perfectly served by the standard subscription at $59/year.
What you actually need for interior design work
| Licence type | Standard subscription (Zoftis) | Commercial licence |
|---|---|---|
| Price | $59/year | $1,499/year |
| Full AutoCAD + toolsets | Yes | Yes |
| Interior design toolset | Included | Included |
| Activates on your Autodesk account | Yes | Yes |
| Commercial use rights | Standard | Full enterprise |
| Best for | Sole practitioners, freelancers, small studios | Multi-seat architecture firms with procurement departments |
Your first project workflow: from empty file to presentation sheet
Let’s walk through what a real residential interior project looks like in AutoCAD — not a tutorial of every command, but the sequence a working designer follows. This is CAD for interior design in actual practice:
Step 1: Set up the base plan
Start with either a measured survey or an architect’s .dwg base. If it’s a PDF or paper survey, import and scale it. Create your layer set: A-WALL, A-DOOR, A-WINDOW, A-FLOOR, A-FURN, A-LIGHT, A-CEIL, A-FINISH. Set your units (mm for most of the world, inches if you’re in the US). Draw or trace the existing walls, doors, and windows on the appropriate layers.
Step 2: Create the proposed floor plan
Duplicate your existing plan layers and rename them as proposed. Adjust wall positions, add new openings, draw in fixed cabinetry, and start dropping furniture blocks from the toolset. Use dynamic blocks for standard items — a 2.4 m sofa block can stretch to 3.0 m without losing its proportions.
Step 3: Generate elevations
Project elevations directly from the floor plan geometry. For each internal wall, draw a section line on the plan, then project up — the wall widths, door heights, and window positions are already known. Add material hatching (tile patterns, timber grain direction, paint finishes) and dimension vertical heights.
Step 4: Build the lighting plan
Freeze everything except the ceiling and proposed layout layers. Drop lighting symbols from the toolset — downlights on a 1.2 m grid, pendants over the dining table and island, wall lights at 1.8 m above finished floor. Add switching zones and circuit notes for the electrician.
Use the Block Attribute Manager to add cost codes and supplier names to furniture blocks. When you extract the block attributes, you’ve got a provisional furniture schedule with pricing — no separate spreadsheet needed.
Step 5: Assemble the finishes schedule
Tag each room with a room name and number. Using the toolset’s schedule generator, assign floor finish (engineered oak, porcelain tile, carpet), wall finish (paint colour, wallpaper, wall panelling), and ceiling finish. The schedule populates in table form on your presentation sheet. Change a paint colour in the tag, and the schedule updates everywhere that room appears.
Step 6: Set up sheets for presentation and construction
In paper space, create an A1 title block. Add viewports at 1:50 for the floor plan, 1:25 for kitchen and bathroom elevations, and 1:10 for any millwork detail. One model file produces every sheet — the presentation layout for the client, the lighting plan for the electrician, and the dimensioned setting-out plan for the builder.
Learning CAD vs buying CAD — why the order matters
There’s a quiet assumption in most auto cad for interior design guides that you should take a course, then buy the software. In practice, the most efficient path is often the reverse: get the software on your machine, open it alongside real project files, and learn by doing — supported by Autodesk’s own documentation, not a $2,000 training programme.
Training courses have their place. If you learn best with structured instruction, deadlines, and a tutor reviewing your work, a short course can accelerate your first two weeks. But the courses marketed specifically as “CAD for interior design” often cost more than the software itself — and they teach generic workflows that may not match the way your projects actually run.
| Approach | Buy first, learn by doing | Course first, buy later |
|---|---|---|
| Upfront cost | $59 (software via Zoftis) + free Autodesk tutorials | $500–$2,500 for the course, plus software later |
| Time to first usable drawing | 1–2 weeks (focused on your actual project type) | 4–12 weeks (course schedule) |
| Learning relevance | You learn exactly what your projects demand | You learn a general curriculum; some modules may be irrelevant |
| Portfolio output | Real client or spec projects from day one | Course exercises — may not match your portfolio style |
| Ongoing support | Autodesk Knowledge Network, YouTube, forums | Tutor access during course duration |
Our recommendation: buy the licence, install it, and spend your first week working through Autodesk’s own “AutoCAD for Architecture” learning path (free, official, and frequently updated). By day five, open a real project — even a past one you’re redrawing for practice. You’ll learn faster because every command has immediate, visible relevance to work you care about.
AutoCAD vs AutoCAD LT for interior work
A common cost-saving instinct: “I’ll just get LT.” Here’s why that backfires for interior design specifically:
AutoCAD LT lacks the specialised toolsets — including the Architecture and interior design workspace with its 8,000+ furniture blocks, finish schedule generator, and detail component libraries. LT is a pure 2D drafting tool. You’ll spend hours drawing blocks that full AutoCAD users drag in from the library, and you’ll manually manage schedules that full AutoCAD generates automatically.
| Capability | AutoCAD (full) | AutoCAD LT |
|---|---|---|
| Interior design toolset | Included (8,000+ blocks, schedule generator, detail components) | Not available |
| 3D modelling | Basic 3D solids for millwork and joinery details | 2D only |
| LISP routines | Custom automation for repetitive tasks | Not supported |
| Sheet set manager | Multi-sheet project management | Limited |
| Annual cost (Zoftis) | $59 | $399 |
At Zoftis pricing, full AutoCAD actually costs less than LT — making the “save money with LT” logic completely backwards for our customers.
Frequently asked questions
Do I need the full AutoCAD or is LT enough for interior design?
Full AutoCAD. The interior design toolset (included with full AutoCAD, not LT) gives you 8,000+ furniture blocks, finish schedule automation, millwork detail components, and lighting symbols. LT is a capable 2D drafter, but you’d spend hours manually creating what full AutoCAD’s toolset provides immediately. At Zoftis pricing ($59 for full vs $399 for LT), there’s no cost argument for choosing LT.
What’s the difference between a standard subscription and a commercial licence?
A standard subscription ($59/year through Zoftis) gives you full AutoCAD, all toolsets, activation on your own Autodesk account, and standard commercial use rights — perfectly adequate for sole practitioners, freelancers, and small studios. The $1,499 Commercial Licence is designed for larger firms requiring enterprise billing, named-user procurement, and full multi-seat management. For most interior designers, the standard subscription is the right product.
Can I produce presentation-quality mood boards in AutoCAD?
Yes, but not in the way Photoshop or InDesign would. AutoCAD’s presentation layout tools let you combine scaled floor plans, elevations, finish schedules, and rendered views on a single sheet — all live-linked to the model. For a pure mood board with images, textures, and freeform layout, pair AutoCAD with something like Photoshop or Canva. Most interior designers use AutoCAD for the technical sheets and a separate tool for the atmospheric presentation board.
How does AutoCAD compare to SketchUp or Revit for interior design?
AutoCAD excels at precise 2D documentation — floor plans, elevations, sections, and construction sheets. SketchUp is stronger for quick 3D massing and client walkthroughs but weaker on construction documentation. Revit is a full BIM platform; overkill for most residential interiors but valuable if you’re coordinating with architects on large commercial fit-outs. Many interior designers run AutoCAD for documentation and SketchUp for 3D visualisation — they complement rather than replace each other.
How long does it take to become proficient at CAD for interior design?
With focused practice on real project files, most designers produce usable floor plans and elevations within two weeks. Proficiency — where CAD stops feeling like an obstacle and becomes faster than hand drawing — typically arrives around the three-month mark, assuming daily use. The interior design toolset accelerates this: instead of learning to draw furniture blocks from scratch, you’re learning to modify and arrange existing ones.
Will this licence work on a Mac?
The standard AutoCAD licence referenced here is for Windows. Zoftis also sells a dedicated AutoCAD for Mac licence at the same $59 price point — a native macOS build with Apple Silicon support. If you’re on a Mac, use that product instead; the Windows and Mac licences are separate SKUs.
Get AutoCAD with the full interior design toolset — $59/year
Genuine Autodesk AutoCAD for Windows, 2024–2026 release. Includes the Architecture toolset with 8,000+ furniture blocks, finish schedule generator, and lighting-plan tools. Delivered by email in 1–12 hours, activated on your own Autodesk account, backed by a 30-day money-back guarantee.
Get AutoCAD for $59 →Also available: AutoCAD for Mac — $59 · Commercial licence for firms — from $1,499