
Blog
AutoCAD Title Block Templates: How to Create and Reuse One

AutoCAD Title Block Template: How to Create, Customise, and Automate One
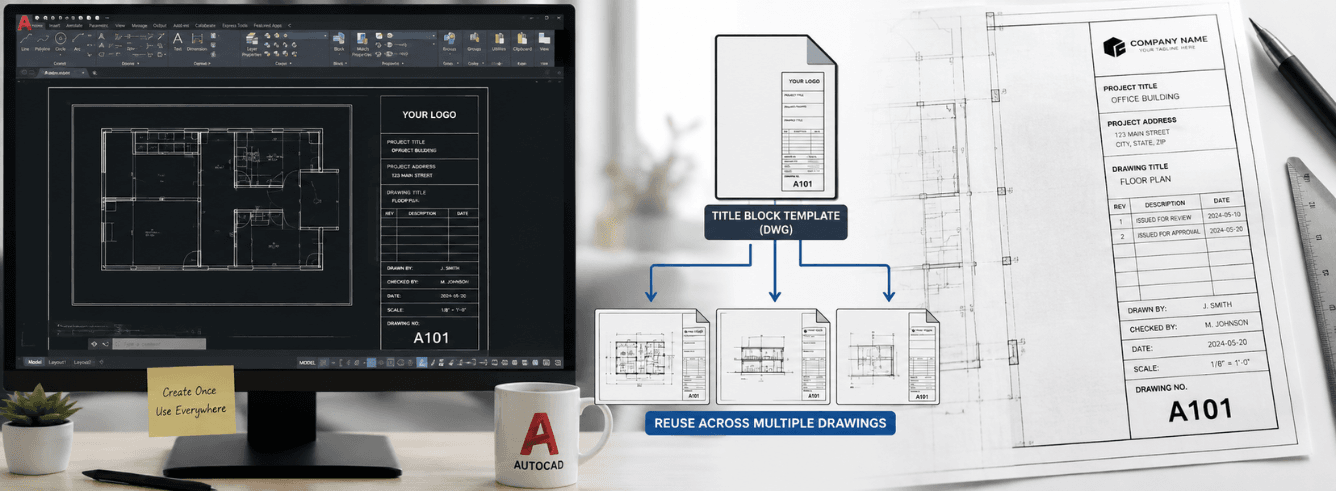
An AutoCAD title block template is the professional backbone of every drawing set — it tells QC, purchasing, and manufacturing what they need to know at a glance. In this guide, I’ll walk you through building a reusable title block, using attributes for editable fields, and automating updates with Sheet Set Manager and external references.
- Paper Space is non-negotiable: Your title block and border live in Layout (Paper Space), not Model Space. This separates design geometry from sheet setup.
- Two workflows matter: Block with Attributes (for sheet-specific data) and XREF (for project-wide consistency). The best practice uses both.
- Contextual fields need attributes: Sheet Set fields and plot-date fields only update in blocks if they’re inserted as block attributes — not as plain text.
- Template libraries save hours: Build a standard title block once, save it as a DWT template, and make it your firm’s default.
Why your title block belongs in Paper Space (and nowhere else)
I’ve seen AutoCAD users draw their title block directly in Model Space at 1:10 scale, then wonder why it looks wrong when plotted. The rule is simple: geometry stays in Model Space; sheet setup — title block, border, viewports — lives in Paper Space (Layout) at 1:1 scale [citation:4].
Drawing a title block in Model Space creates a maintenance nightmare. Try editing a title block drawn at 1:10 scale and you’ll see what I mean. Professional drawing submissions (especially for OEM suppliers) expect title blocks in Paper Space with correctly scaled viewports [citation:4].
| Drawing Space | What goes here | What stays out |
|---|---|---|
| Model Space | Design geometry, 3D models, drawing content | Title blocks, borders, text annotations at sheet scale |
| Paper Space (Layout) | Title block, border, viewports, plot setup | Design geometry (except when using viewports) |
Two title-block workflows: XREF vs block with attributes
AutoCAD gives you two primary ways to create a title block: as a block with attributes, or as an XREF (external reference) [citation:7]. Each serves a different purpose, and knowing which one to use — or how to combine them — is the difference between a clunky setup and a smooth workflow.
Workflow 1: Block with attributes
This is the go-to method when each drawing needs unique sheet-specific information. You create a block where editable fields (drawing number, revision, date, title) are defined as attributes using the ATTDEF command. When you insert the block into a layout, double-clicking opens the attribute editor for filling in the fields [citation:4].
Workflow 2: XREF title block
An XREF-based title block is a separate .dwg file that you attach to your drawings. Edit the source file, and every drawing referencing it updates automatically. This is the method for project-wide consistency [citation:7].
Best practice: Use an XREF for the title block graphics (logos, borders, layout) and a local attributed block for Sheet Set Manager fields. This gives you project-wide graphic updates with sheet-specific data automation [citation:6].
Building an AutoCAD title block template with attributes
Creating an AutoCAD title block template with attributes means building editable fields that prompt the user for information on insertion. Here’s the step-by-step.
Step 1: Draw your title block layout
In a blank drawing in Paper Space (Layout tab), draw the border and title block grid lines. Use a 1:1 scale because you’re working on the sheet itself. Include placeholders for your company logo, drawing title, drawing number, revision table, scale bar, and approval fields.
Step 2: Define attributes with ATTDEF
Type ATTDEF at the command line. This opens the Attribute Definition dialog. Enter a Tag (e.g., “DRAWING_TITLE”), a Prompt (e.g., “Enter drawing title”), and a default value if applicable. Place each attribute where you want it in the title block. Common attributes include:
- Drawing number — Tag: DWGNO, Prompt: “Enter drawing number”
- Revision level — Tag: REV, Prompt: “Enter revision”
- Sheet number — Tag: SHEET, Prompt: “Enter sheet number”
- Scale — Tag: SCALE, Prompt: “Enter scale”
- Drawn by / Checked by / Approved by — Tags: DRAWN, CHECKED, APPROVED
- Drawing date — Tag: DATE, Prompt: “Enter date”
- Material and surface finish — as needed for mechanical drawings
Step 3: Create the block
Use the BLOCK command. Select all the geometry and attributes you’ve just created. Give the block a name (e.g., “A3_TITLEBLOCK”). Choose an insertion point (usually the bottom-right corner of the border). In the Block Definition dialog, ensure “Convert to block” is selected and click OK.
Using XREFs for project-wide title block consistency
For large projects with dozens or hundreds of sheets, the XREF method is a lifesaver. Here’s how to set it up.
Creating the XREF title block file
Create a separate .dwg file that contains your title block design — graphics, border, and any static text. Save it as “TITLEBLOCK_MASTER.dwg” in a shared network location or project folder. This file becomes the source.
Attaching the XREF to each drawing
In each drawing, go to the Insert tab → Attach (in the Reference panel). Browse to your title block .dwg file, check “Specify on-screen,” and place it in Paper Space [citation:9]. Position it within the dashed print border.
A single XREF title block update can refresh 100 sheets in seconds. That’s the power of external references done right.
Caution: XREFs alone won’t automate sheet-specific data like drawing numbers and titles. For that, you need local attributes combined with Sheet Set Manager fields.
Automating with Sheet Set Manager fields and custom properties
Sheet Set Manager (SSM) is AutoCAD’s built-in tool for managing multi-sheet projects. When paired with your title block, it transforms manual data entry into automated population.
What Sheet Set Manager can auto-populate
SSM can push values directly into title block attributes. This includes sheet number, drawing title, revision number, revision date, issue purpose, and project-wide data like project name and project number [citation:10].
Custom properties for project-level data
In Sheet Set Manager, you can define custom properties (e.g., “ProjectNumber”, “ClientName”, “SiteAddress”). These values are entered once at the project level and can be mapped to title block attributes across every sheet. This ensures consistency and eliminates typing errors.
Critical: Sheet Set fields and other contextual fields will NOT update if placed inside a block or XREF as plain text. They must be inserted as block attributes. This is the single most common mistake with title block automation.
The critical field-update rule every drafter must know
AutoCAD fields are powerful — they auto-populate text from drawing properties, system variables, and sheet set data. But there’s a catch that trips up even experienced drafters.
Contextual fields require attributes
Some fields are “contextual” — their value depends on which layout or sheet they’re in. The PlotDate field, for example, shows the current plot date. The SheetNumber field shows the current sheet number. In blocks and XREFs, these fields are not updated automatically [citation:3]. They display the last cached value from when the block was saved.
Which fields are contextual and won’t update in blocks
According to Autodesk documentation, the following fields will NOT update in blocks and XREFs unless they’re attributes: Sheet Set fields, DeviceName, PaperSize, PlotDate, PlotOrientation, PlotScale, PageSetupName, PlotStyleTable [citation:3].
The fix: attributes every time
To use these fields in your title block, insert them as block attributes. When you insert the block, attributes update to show the current value from the host drawing [citation:11]. For sheet set fields, the value displayed depends on which sheet the title block is inserted into.
Hybrid solution for XREF + SSM fields
If you’re using an XREF for title block graphics, create a local attributed block (within each sheet) that holds the SSM fields. Keep the graphics in the XREF. This way, you get the best of both worlds: project-wide graphic updates from the XREF, and automated sheet-specific data from the local attributes [citation:6].
Tip: Use the FIELDEVAL system variable to control when fields update. But remember — it won’t fix contextual fields inside blocks. Only attributes will.
Saving your title block as a DWT template for reuse
Once your title block is built and working, save it as a drawing template (.dwt) so every new project starts with your standard setup.
Save location for templates
On Windows, save templates to: C:\Users\Username\AppData\Local\Autodesk\AutoCAD 20XX\RYY\enu\Template. On Mac: Users/Username/Library/Application Support/Autodesk/AutoCAD LT 20XX/RYY.0/Local/@en@/Template [citation:9].
Template best practices
- Standardise naming: Use consistent naming like “A3_PROJECT_TEMPLATE.dwt” so drafters can find it easily.
- Preload layers and styles: Your template should include predefined layers, text styles, dimension styles, and plot styles — not just the title block.
- Lock what you can: Consider write-protecting the template file to prevent unauthorised changes.
- Build a library by project type: A structural drawing template differs from a mechanical or architectural one. Build templates for each discipline.
Frequently asked questions
How do I create a title block template in AutoCAD?
Draw your title block in Paper Space at 1:1 scale. Define editable fields using the ATTDEF command (attributes). Use the BLOCK command to convert everything into a block. Save the drawing as a .dwt template file. Then insert this block into any new drawing’s Layout tab.
What’s the difference between a block and an XREF for title blocks?
An XREF is an external file you attach to multiple drawings — edit one source file and every drawing updates. A block with attributes lives inside each drawing and stores sheet-specific data. Professional workflows often use both: XREF for graphics, local attributes for Sheet Set fields.
Why is my Sheet Set field not updating in my title block?
Contextual fields like Sheet Number and PlotDate only update in blocks when they are inserted as block attributes. If you inserted the field as plain text or as a standalone field in a block, it will show the cached value from when the block was saved, not the current sheet data [citation:3].
Can I use a title block template for different sheet sizes (A1, A3, A4)?
Yes. Save each size as a separate template or create a dynamic block with visibility states for each sheet size. Most CAD managers prefer separate templates (e.g., A1_TITLEBLOCK.dwt, A3_TITLEBLOCK.dwt) for simplicity.
How do I add a company logo to an AutoCAD title block template?
Insert your logo as an image (use the ATTACH command for raster images) or as an imported vector file (PDF or DXF). Place it in the title block before you create the block. Remember that images in blocks stay with the block — they don’t need to be reinserted each time.
Ready to build your AutoCAD title block template?
Get a genuine Autodesk AutoCAD subscription for Windows — 2024–2026 release, 1-year term, starting at $59. Delivered to your Autodesk account within 1–12 hours, with a 30-day money-back guarantee.
Get AutoCAD price for Windows →Also available: AutoCAD for Mac | AutoCAD LT 2027