
Blog
How to Insert a PDF into AutoCAD (Underlay, Import & Trace)

How to Insert PDF into AutoCAD – Underlay vs. Editable Geometry
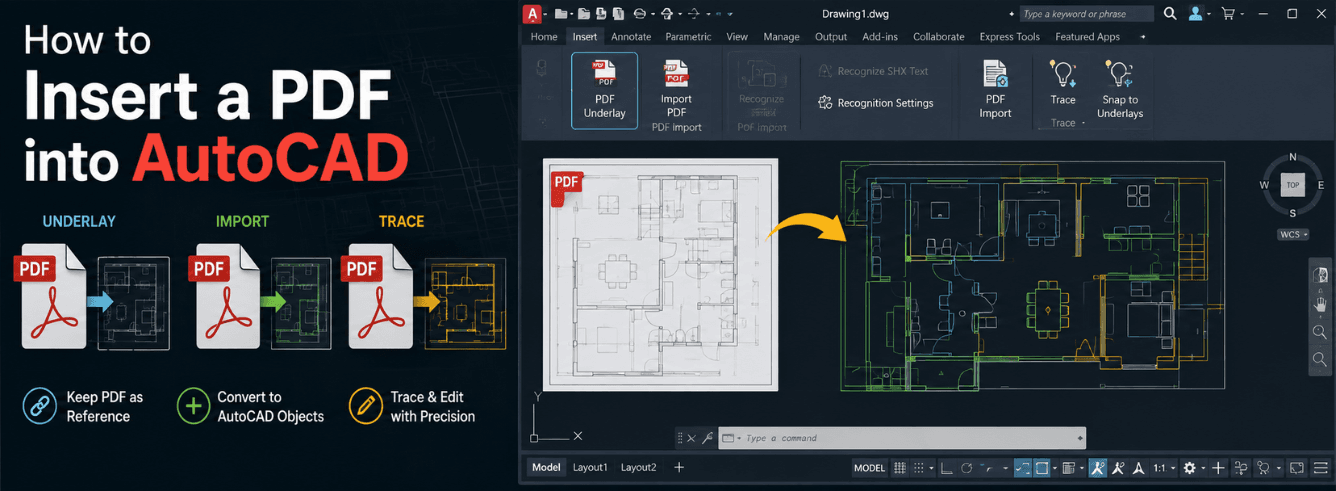
How to insert pdf into autocad is one of the most common questions new users ask. The answer is not one‑size‑fits‑all: you have two distinct methods — attach as a reference underlay or import as editable geometry. This guide walks you through both.
- PDFATTACH links a PDF as an external reference — you can snap to it but not edit it.
- PDFIMPORT converts vector PDF content into native AutoCAD objects — lines, arcs, circles, and text you can modify.
- Scanned (raster) PDFs cannot be converted to editable geometry directly — you’ll need to trace over them or use raster‑to‑vector software.
- Always verify scale immediately after import using a known dimension.
Why AutoCAD Gives You Two Ways to Insert a PDF
When you need to know how to insert pdf into autocad, the first thing to understand is that AutoCAD treats a PDF file as either a reference or source data. The command you choose changes what you can do with that PDF afterward.
If you attach the PDF, it behaves like an external reference (Xref) — it’s displayed in your drawing but remains a separate file. You can see it, snap to its geometry, and use it as a visual guide, but you cannot modify its content. If you import the PDF, AutoCAD extracts vector data and turns it into native drawing objects — lines, polylines, arcs, circles, and text — that become part of your DWG file.
PDFIMPORT was introduced in AutoCAD 2017. Before that, the only way to use PDF data was to attach it and trace over it manually — which is why many long‑time users still default to underlays.
The critical distinction is whether your PDF contains vector data (lines, shapes, text as selectable objects) or raster data (scanned images, photos). Only vector PDFs can be imported as editable geometry. If you try to import a scanned PDF, you’ll get a raster image — not editable lines — and you’ll have to trace over it anyway.
So the first step in learning how to insert pdf into autocad correctly is to check your PDF’s nature. Open it in a PDF reader and try to select text or lines with your cursor. If you can select individual elements, it’s vector‑based. If you can only select the whole page as a picture, it’s raster‑based.
How to Insert PDF into AutoCAD as an Underlay (PDFATTACH)
This is the simplest method when you only need to view or snap to a PDF. Learning how to insert pdf into autocad as an underlay takes less than a minute.
Step‑by‑step: attaching a PDF underlay
- On the Insert tab of the ribbon, click Attach in the Reference panel.
- Or type PDFATTACH at the command line and press Enter.
- Browse to your PDF file and select it.
- In the Attach PDF Underlay dialog, choose the page number (for multi‑page PDFs), set insertion point, scale, and rotation angle.
- Click OK — the PDF appears as an underlay in your drawing.
After attaching, you can snap to geometry in the underlay using standard object snaps — just ensure Enable Snap is turned on in the PDF Underlay contextual tab.
Adjusting how your underlay looks
Once attached, you can control its appearance via the PDF Underlay contextual tab that appears when you select the underlay.
- Fade — dims the underlay so your own drawing lines stand out. Higher values make it more transparent.
- Contrast — adjusts the contrast of the underlay display.
- Display in Monochrome — forces the underlay to appear in black and white.
- Create Clipping Boundary — crops the underlay to show only a specific area.
When to choose the underlay method
- You only need to reference the PDF — no editing required.
- The PDF is a scanned image — you’ll trace over it manually.
- You want to snap to PDF geometry while drawing new objects.
- You want to keep file size small — underlays are linked, not embedded.
- The PDF may be updated later — underlays refresh when the source file changes.
If these conditions fit your task, this is the quickest way to insert pdf into autocad without cluttering your drawing with uneditable geometry.
How to Insert PDF into AutoCAD as Editable Geometry (PDFIMPORT)
For users who need to edit the PDF content directly, this is the method to master. Understanding how to insert pdf into autocad via PDFIMPORT will save you hours of manual tracing.
Critical: PDFIMPORT only works on vector‑based PDFs. If you attempt to import a scanned PDF, you’ll get a raster image — not editable geometry.
Step‑by‑step: importing a PDF with PDFIMPORT
- Go to the Insert tab and click PDF Import in the Import panel.
- Or type PDFIMPORT at the command line and press Enter.
- Select your PDF file and click Open.
- If the PDF has multiple pages, choose which page(s) to import.
- In the Import PDF dialog, review the import options (see below).
- Set insertion point and scale, then click OK.
- AutoCAD converts the vector content into native DWG objects — and you’re done.
Understanding the import options
The Import PDF dialog offers several critical settings. Knowing these helps you control exactly how to insert pdf into autocad with the best results.
| Option | What it does |
|---|---|
| PDF data to import | Choose which elements to bring in — vector geometry, raster images, TrueType text, or all three. |
| Layer options | Use PDF layers (preserves original layer structure), Create object layers (groups by object type), or import to the Current layer. |
| Import solid fills as | Convert filled areas to hatches or 2D solids. |
| Combine collinear segments | Merges aligned line segments into single polylines — reduces clutter. |
How text is handled during import
Text is often the trickiest part of PDF import. Here’s what happens.
- TrueType fonts — preserved as editable text objects (Mtext).
- SHX fonts — imported as separate geometric objects (lines and arcs that look like text).
- After import, use the PDFSHXTEXT command to convert SHX geometry back into real text objects.
PDFSHXTEXT compares the imported geometry against SHX fonts installed on your system. If the match passes the recognition threshold, it converts to Mtext.
When to choose import over underlay
- You need to edit the content — move lines, change text, modify geometry.
- The PDF was exported from CAD or another vector‑based program.
- You want the PDF content to become a permanent part of your DWG.
- You want to avoid manual tracing entirely.
For most professionals, this is the preferred way to insert pdf into autocad because it turns static PDFs into working drawings.
Underlay vs. Import — Which Method Should You Choose?
To decide which approach fits your workflow, compare them side by side. This table makes it clear when to use each method to insert pdf into autocad.
| Feature | Underlay (PDFATTACH) | Import (PDFIMPORT) |
|---|---|---|
| Editable geometry | No — reference only | Yes — lines, arcs, text become native objects |
| File size impact | Minimal — linked externally | Larger — geometry added to DWG |
| Works with scanned PDFs | Yes — display as image | No — imports as raster image only |
| Object snapping | Yes — snap to underlay geometry | Yes — snap to imported objects |
| Multi‑page support | Yes — attach any page | One page at a time (without add‑ons) |
| PDF updates | Yes — updates if PDF changes | No — static import |
| Layer preservation | Yes — view PDF layers | Yes — import with PDF layers or create new ones |
If you need to edit it, use PDFIMPORT. If you just need to see it, use PDFATTACH. That’s the rule.
You can also import part of an already‑attached PDF underlay — select the underlay, right‑click, and choose PDF Import as Objects.
Troubleshooting Common PDF Insertion Problems
Even when you know how to insert pdf into autocad, things can go wrong. Here are the most frequent issues and their fixes.
“No objects were imported”
- Your PDF is raster‑based — it’s a scanned image, not vector data. In the Import PDF dialog, check Raster images under PDF data to import.
- PDFIMPORT is set to import vectors only — and your PDF doesn’t contain any. Same fix: enable Raster images.
Imported geometry is the wrong scale
- Use a known dimension (door width, room size) and measure it with DIST.
- If it’s off, use the SCALE command with the Reference option to correct it.
- For PDFs exported from Fusion 360, you may need to scale by 25.4 (converting mm to inches).
- Alternatively, use the ALIGN command to scale and position in one operation.
Always verify scale immediately after import. If you start editing before checking, you’ll waste time fixing geometry that was wrong from the start.
Raster images from PDF aren’t showing up
- Make sure Raster images is checked in the Import PDF dialog.
- Check the PDFIMPORTIMAGEPATH system variable — this controls where extracted images are saved.
- In Options > Files tab, expand PDF Import Image Location and set a valid folder.
AutoCAD crashes when importing or attaching PDFs
- Install the latest AutoCAD updates. The AutoCAD 2027.1 update (July 2026) fixed several PDF‑related crashes.
- Try using PDFATTACH instead of PDFIMPORT as a workaround.
- Reprint the PDF using Microsoft Print to PDF and try again.
SHX text isn’t recognized
- Use the PDFSHXTEXT command after import to convert SHX geometry to Mtext.
- Make sure the correct SHX fonts are installed on your system.
- If the text appears as comments in the PDF, check the PDFSHX system variable.
Pro Tips for a Smooth PDF‑to‑AutoCAD Workflow
These additional insights will help you master how to insert pdf into autocad efficiently.
Always check your PDF type first
This single step avoids 90% of confusion. Open your PDF in any viewer and try to select text or lines. If you can click on individual elements, it’s vector — use PDFIMPORT. If you can only select the whole page as a picture, it’s raster — use PDFATTACH and trace.
Clean up imported geometry
Even a perfect import usually needs some polish before it’s production‑ready.
- Separate content onto proper layers — walls, dimensions, text, and symbols all on one layer makes a drawing unusable.
- Run PURGE to remove unused layers, blocks, and styles.
- Run AUDIT to check for and repair drawing corruption.
- Use OVERKILL to remove duplicate geometry.
Imported PDF geometry often comes in as individual line segments. Use PEDIT with the Join option to merge them into continuous polylines.
Handling multi‑page PDFs
PDFATTACH lets you attach any page from a multi‑page PDF. PDFIMPORT, by default, only imports one page at a time. If you need to import multiple pages, you can download the MPDFimport.LSP routine (load it with APPLOAD, then use MPDFIMPORT).
Use the PDF Underlay contextual tab
When you select a PDF underlay, a special ribbon tab appears with powerful tools:
- Edit Layers (ULAYERS) — control which PDF layers are visible.
- Create Clipping Boundary — show only part of the PDF.
- Show Underlay — toggle visibility on and off.
When all else fails — trace manually
If your PDF is a low‑quality scan or has complex geometry that doesn’t import cleanly, sometimes the fastest solution is to attach it as an underlay and trace over it using polylines, arcs, and text. It’s labor‑intensive, but for small drawings, it can be quicker than fighting with import settings.
Ready to start using AutoCAD?
Get a genuine Autodesk AutoCAD for Windows license — 2024–2026 release, 1‑year subscription, delivered within 1–12 hours, with a 30‑day money‑back guarantee. From $59/year.
Get AutoCAD Price →Also available: AutoCAD for Mac · AutoCAD LT
Frequently Asked Questions About Inserting PDFs into AutoCAD
How do I insert a PDF into AutoCAD without it being a picture?
Use the PDFIMPORT command (Insert tab > PDF Import) to convert a vector‑based PDF into editable AutoCAD objects — lines, arcs, circles, and text. This only works on vector PDFs, not scanned images. That’s the most direct answer to how to insert pdf into autocad for editing purposes.
What’s the difference between PDFATTACH and PDFIMPORT?
PDFATTACH inserts the PDF as an external reference (underlay) — you can see it and snap to it but not edit it. PDFIMPORT converts the PDF’s vector content into native AutoCAD objects that you can edit freely. Both are valid ways to insert pdf into autocad — the choice depends on whether you need to edit.
Why can’t I edit text after importing a PDF?
If the text used SHX fonts in the original drawing, it imports as geometric objects (lines), not as text. Use the PDFSHXTEXT command after import to convert SHX geometry back into editable Mtext objects. This is a common hurdle when learning how to insert pdf into autocad.
Can I import a scanned PDF into AutoCAD?
Yes, but only as a raster image, not as editable geometry. Use PDFIMPORT and check the Raster images option in the Import PDF dialog. You’ll then need to trace over the image manually or use raster‑to‑vector conversion software. So when you insert pdf into autocad from a scan, expect to do some manual work.
How do I scale a PDF correctly after importing?
Use a known dimension from the PDF (like a door width) and measure it with the DIST command. If it’s incorrect, use the SCALE command with the Reference option to scale the entire imported geometry to the correct size. This is a critical step after you insert pdf into autocad via import.
Why does my PDF underlay look fuzzy when I plot?
PDF underlays are treated as referenced objects, not native geometry. For crisp plots, convert the underlay to native objects using PDFIMPORT before plotting. If the PDF is a mix of raster and vector, try increasing the PDF plotter raster DPI.