
Blog
Generative Design in Fusion 360: A Beginner’s Walkthrough

Fusion 360 Export STL: Complete Guide to 3D Printing Workflows
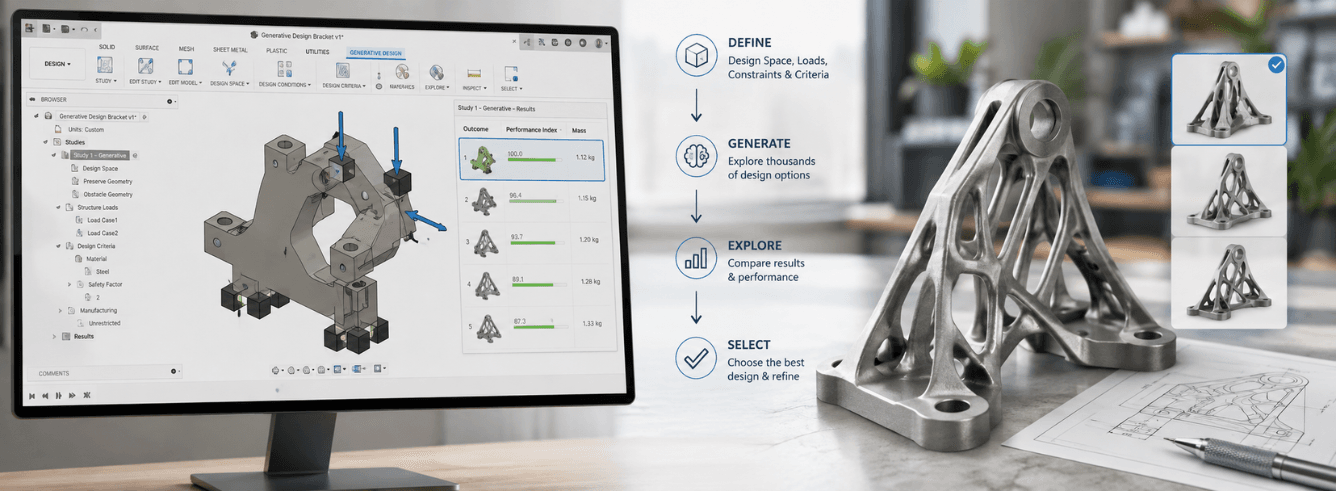
When you need to fusion 360 export STL files for 3D printing, having the right workflow makes all the difference. Fusion 360 offers three native methods—Save As Mesh, 3D Print, and File > Export—each suited to different scenarios. This guide walks you through every approach, helps you choose the right one, and shows you how to avoid common pitfalls that waste time and material.
- Fusion 360 provides three official routes for STL creation: Save As Mesh (quickest), 3D Print (most adjustable), and File > Export (cloud-based for complex files).
- Mesh refinement directly impacts print quality: Curved surfaces need higher resolution; balance this against file size for slicer compatibility.
- Assembly exports can be handled two ways: save everything as one STL or each body separately—multi-colour printing usually needs individual files.
- Converting meshes back to solids is possible: the Mesh tab’s Convert Mesh tool works well with face groups for scan data.
- Commercial users need a valid license: Zoftis offers genuine Autodesk Fusion 360 subscriptions starting at $59/year for Windows.
Three ways to generate STL files
Autodesk Fusion 360 provides three built-in methods for creating STL files, each suited to different scenarios. Understanding these options helps you work more efficiently and avoid export failures.
The available approaches are:
- Save As Mesh — accessed by right-clicking a body or component in the browser. This is the quickest option and works well for individual parts.
- 3D Print command — located in the Tools tab under the Make menu. It offers fine-grained mesh controls and can send files directly to slicers like Cura and Bambu Studio.
- File > Export — processes files through Autodesk’s cloud infrastructure. This handles complex assemblies and configured files that other methods struggle with.
When working with assemblies, you have a choice: generate one combined STL or create separate files for each body. Multi-colour printing setups typically need individual body exports.
Good to know: All three STL creation methods work in Fusion 360’s free personal use license. You don’t need a paid subscription just to prepare files for printing.
Method comparison: which approach fits your needs?
Each STL generation method has strengths and weaknesses. Here’s how they compare in practice.
| Feature | Save As Mesh | 3D Print command | File > Export |
|---|---|---|---|
| Speed | Fastest — one click | Moderate — dialog options | Slowest — cloud processing |
| Mesh refinement control | Basic | Advanced — high quality for organic shapes | Basic |
| Slicer integration | No | Yes — direct to Cura, PreForm, Bambu Studio | No |
| Assembly handling | Yes — right-click top-level component | Yes — select multiple bodies | Yes — best for configured files |
| Additional formats | STL, 3MF | STL, 3MF, OBJ | STL plus many CAD formats |
For simple parts, Save As Mesh gets the job done fastest. When your design includes complex curves, the 3D Print command gives you better control over mesh quality. And when other methods fail, File > Export serves as a reliable fallback.
Smart approach: For models with curved surfaces, use the 3D Print command with refinement set to High. This increases triangle density and preserves detail when you fusion 360 export STL for complex parts.
Save As Mesh: the right-click shortcut
Save As Mesh is the fastest way to generate an STL when you need a quick file for a single part or component.
Using Save As Mesh
- In the browser tree on the left, right-click the body, component, or component group you want to export.
- Select Save As Mesh from the context menu.
- Choose your output format — STL (binary or ASCII) or 3MF.
- Click OK and save the file locally.
Exporting multiple components
When you need to prepare files for several parts, you have a few options:
- Select multiple bodies: Ctrl+click (Windows) or Cmd+click (Mac) in the browser, then right-click and choose Save As Mesh.
- Export the full assembly: Right-click the top-level component and choose Save As Mesh — this combines everything into one file.
- Individual component files: Right-click each part separately when you need separate files for multi-colour printing.
Watch for this: Save As Mesh may not work with certain object types or complex assemblies. If the option is greyed out, switch to File > Export instead.
3D Print command: direct slicer integration
The 3D Print command offers the most control when preparing models for printing. It provides mesh refinement options and can send files straight to your slicer application.
Using the 3D Print command
- Switch to the Tools tab in the toolbar.
- Click 3D Print from the Make menu.
- Select the bodies you want to export.
- If you only want to save a file without opening a slicer, deselect “Send to 3D Print Utility.”
- Adjust mesh refinement — higher quality for curved surfaces, lower for faster slicing.
- Click OK and save your file.
Common fix: If the OK button becomes unresponsive after deselecting “Send to 3D Print Utility,” click next to “Selection” in the dialog and reselect your geometry. The button will reactivate so you can fusion 360 export STL without issues.
Slicer integration options
Keep “Send to 3D Print Utility” selected to send your file directly to:
- Bambu Studio
- UltiMaker Cura
- PreForm
- Creality Print
- Chitubox Pro (with add-ins)
This streamlines your workflow by automatically launching the slicer with your file ready.
File > Export: cloud processing for complex models
When other methods won’t work or you’re dealing with configured files, File > Export is your backup. This approach uses Autodesk’s cloud translation service to generate your STL.
Using File > Export
For files without configurations:
- Click File in the top menu.
- Select Export.
- Choose STL from the file type dropdown.
- Click Export — the file processes in the cloud before downloading.
For configured files:
- Click File > Export.
- In the first tab, switch to Active Configuration.
- Select STL as the file type.
- Click Export.
File > Export also supports other formats like .F3D, .IGES, .SAT, .STEP, and .SMT for sharing with collaborators.
When to use this: File > Export is the most reliable choice for complex assemblies or files with configurations. It’s slower but more robust than other ways to fusion 360 export STL.
Getting files out is only half the story. Bringing them back in opens new possibilities.
Bringing STL files into Fusion 360
To work with an STL in Fusion 360, you import it as a mesh body. Three methods are available, each with different advantages.
Insert Mesh (recommended)
This method gives you full control over scaling and positioning:
- Navigate to the Mesh tab in the toolbar.
- On the Create panel, click Insert Mesh.
- Select your STL file and click Open.
- Set the unit type — millimetres, centimetres, inches, etc. STL files don’t carry unit information, so this step is crucial.
- Reposition the mesh by flipping axes or centering it on the origin as needed.
- Click OK.
Open or Upload
For quicker import without the Insert Mesh dialog:
- File > Open — opens the STL as a new Fusion design file in direct modelling mode.
- Data panel > Upload — uploads STL, OBJ, or 3MF files to your Fusion project.
Unit alert: When using File > Open, one unit from the original file is interpreted as one centimetre — even if you designed in millimetres. Always verify your scaling.
Converting mesh to solid: working with scan data
After importing an STL, you might want to convert it to a solid body for parametric editing. Fusion 360 includes tools for this, but there are important considerations.
How to convert mesh to solid
- Go to the Mesh tab in the toolbar.
- Click Modify and select Convert Mesh.
- Select the mesh body you want to convert.
- Choose between Parametric and Base Feature:
- Parametric: Creates individual faces for each mesh face — cleaner appearance but more resource-intensive.
- Base Feature: Creates a copy of your mesh body — useful for preserving the original.
- Click OK.
Face groups and complexity
Fusion 360 handles conversion best when meshes have fewer than 10,000 faces. For larger files, consider these steps:
- Reduce facets using the Modify menu tools before conversion.
- Generate face groups from the Prepare menu to help Fusion identify geometric features.
- If you get a “Cannot convert mesh body to solid” error, generating face groups first often resolves it.
Surface body fix: If your conversion produces a surface body instead of a solid, look for open surfaces. Patch them and stitch the patch to complete the solid.
Two conversion paths: Fusion 360 offers an Organic conversion option that goes tri-mesh → quad-mesh → T-spline → B-rep. The base feature option stops at T-spline, letting you edit further before converting.
Solving common STL issues
Even experienced users encounter problems when preparing STL files. Here’s how to address the most frequent issues.
Export fails or stops midway
If your export stops partway through or shows “Translation failed”:
- Switch to the 3D Print command — this often bypasses the issue when you fusion 360 export STL.
- If using File > Export, try 3D Print as an alternative.
STL option missing from export dropdown
When STL doesn’t appear in File > Export:
- Use the 3D Print command as an alternative — it supports STL creation natively.
- Verify you’re in the Design workspace — STL export isn’t available in all workspaces.
OK button greyed out in 3D Print dialog
This occurs when “Send to 3D Print Utility” is deselected:
- Reselect your geometry — click next to “Selection” in the dialog and choose your bodies again.
- The OK button will reactivate so you can fusion 360 export STL successfully.
Mesh conversion fails with “Cannot convert mesh body”
If Convert Mesh fails:
- Generate face groups first — use Prepare > Generate Face Groups before converting.
- Reduce mesh complexity — use Modify > Reduce Mesh to get under 10,000 faces.
- Ensure Capture Design History is enabled in the browser.
Mesh converts to surface, not solid
When conversion creates a surface body:
- This usually means mesh triangles caused an error during conversion.
- Find the open surface, use Patch to close it, then Stitch to create a solid.
Remember this: STL files don’t store unit information. Always check your scaling before slicing—millimetres vs inches is a frequent mistake when you fusion 360 export STL for production.
Ready to take your Fusion 360 work further?
Get a genuine Autodesk Fusion 360 for Windows subscription — $59 (reg $99). Email delivery within 1–12 hours, backed by a 30-day money-back guarantee.
Get Fusion 360 Now →CAD, CAM, CAE and PCB all in one subscription. Activated on your own Autodesk account.
Frequently asked questions
What’s the quickest way to fusion 360 export STL?
The fastest approach to fusion 360 export STL is Save As Mesh — right-click a body or component in the browser tree and select it. No dialogs, no cloud processing, just a quick file save.
Can I generate separate STL files for multiple bodies?
Yes, you can right-click multiple selected components and choose Save As Mesh, or use the 3D Print command with multiple bodies selected. For multi-colour printing, separate files are usually needed when you fusion 360 export STL for complex projects.
How do I turn an STL into a solid body in Fusion 360?
Go to the Mesh tab, click Modify > Convert Mesh, select your mesh, choose Parametric or Base Feature, and click OK. For meshes over 10,000 faces, consider reducing complexity first before you fusion 360 export STL for editing.
Why won’t my file export properly from Fusion 360?
Common causes include file complexity, model errors, or using the wrong method. Try the 3D Print command or File > Export if Save As Mesh fails. If the OK button is greyed out in 3D Print, reselect your geometry to fusion 360 export STL without issues.
What’s the difference between binary and ASCII STL?
Binary STL files are smaller and more widely used for 3D printing. ASCII STL files are larger but human-readable. Most slicers accept both formats. Binary is preferred for faster uploads and smaller file sizes when you fusion 360 export STL.
Do I need a paid license to create STL files in Fusion 360?
No — all three methods (Save As Mesh, 3D Print, File > Export) work in Fusion 360’s free personal use license. You don’t need a paid subscription to fusion 360 export STL for personal projects.
Which file format should I use for 3D printing from Fusion 360?
STL is the most universally supported format for 3D printing. Choose binary format for smaller files. For multi-colour prints, 3MF offers advantages over STL when you fusion 360 export STL for advanced workflows.
How do I fix a non-watertight STL from Fusion 360?
Most slicers can repair minor holes automatically. For major issues, use Fusion 360’s mesh repair tools before you fusion 360 export STL, or use dedicated software like Netfabb or Meshmixer for complex repairs.